")
Good lighting keeps you seen and lets you see. However, many riders still strap a bright “torch” to the handlebar and hope for the best. As a result, drivers get glare, side visibility stays weak, and the bright circle disappears in rain. This guide fixes that. Step by step, you’ll learn which beam patterns work, how to aim them correctly, where to mount each light, and which small upgrades make the biggest difference in real traffic.
To keep things practical, we’ll use simple language and clear examples. By the end, you’ll know the pieces of a polite, confidence-building lighting setup that works both in the city and on dark paths.
1) Brightness is not visibility: why beam pattern matters
Many product pages shout about lumens. At first glance, more lumens sound great; nevertheless, lumens measure total light leaving the lamp, not how well that light is shaped for the road. Therefore, true visibility comes from placing light where your eyes—and other people’s eyes—actually need it.
- You need foreground light to read bumps and potholes.
- You need mid-range light to plan your line.
- You need a controlled upper cutoff so you don’t blind oncoming traffic.
- You need side and rear visibility so others catch your motion at intersections.
Consequently, the shape of the beam—not the raw output—decides whether your upgrade helps or hurts.
2) The quick glossary: lumens, lux, and candela
Before choosing a lamp, let’s demystify the common numbers.
- Lumens (lm): total light produced. Even so, high lumens can look poor if the beam wastes light.
- Lux (lx): light on a surface at a given distance (e.g., 10 lux at 10 m). In practice, lux speaks to useful illumination.
- Candela (cd): intensity in a given direction. Accordingly, a headlight with more candela in the road zone often feels brighter where you need it.
In short, lumens tell you quantity, while lux and candela hint at quality. Whenever possible, compare beam photos or lux charts rather than lumen numbers alone.
3) Beam patterns explained (with everyday analogies)
A) Flood beam (wide and even)
Think of a room light: it spreads illumination everywhere. Consequently, flood beams are gentle up close and great for slow speeds, parks, and shared paths. In rain, they feel comfortable because they avoid harsh sparkle. However, they can lack punch far ahead.
Best use: secondary bar light, city speeds, wet weather.
B) Spot beam (narrow and far)
Now picture a flashlight: it throws a tight, bright spot down the road. Therefore, you gain distance vision for higher speeds. Yet, you risk tunnel vision and glare if the spot rides above eye level.
Best use: supplement to a cutoff headlight; not ideal alone for traffic.
C) Hybrid beam (spot center + flood shoulders)
Imagine car low beams: a defined hot spot with gentle spill to the edges. As a result, hybrids balance distance with nearby coverage. On scooters, this is often the sweet spot if the upper edge is controlled.
Best use: primary headlight for mixed urban riding.
D) Cutoff/asymmetric beam (glare-controlled)
Think of a projector low beam in a car. Typically, the top edge steps up toward the curb side and stays low toward oncoming lanes. Because of this, the road gets light while other road users are protected from glare. In effect, more light hits pavement instead of eyes.
Best use: number one choice for traffic-heavy routes.
E) Daytime running light (DRL) pattern
A DRL is not about seeing the road; it’s about being seen. Accordingly, DRLs use distinctive shapes and moderate intensity to signal presence without blinding anyone.
Best use: always-on visibility in daylight and twilight.
4) The winning recipe: layer your front lights
A single lamp rarely does everything well. Consequently, a two-light front setup is both practical and affordable:
- Primary headlight: a cutoff or well-shaped hybrid aimed low. This handles your road illumination.
- Secondary light: a small flood on a different mount (helmet or fork/bar end). This fills shadows and adds a “look here” cue when you turn your head at junctions.
Because each light has a job, you can run lower brightness overall and still see better—meanwhile, you cause less glare for others.
5) Aiming that actually works (5-minute procedure)
Even the best beam fails when it points too high. Therefore, use this quick method on a flat road or wall.
- Park six to eight meters from a wall or garage door.
- Set the scooter at ride height (stand on it or add backpack weight).
- Level the lamp housing so the beam’s flat cutoff sits below your eye height at the wall. As a starting point, drop the top cutoff about 5–10 cm at 6–8 m.
- Ride and refine. If oncoming road users still squint, tilt a touch lower; if you can’t read signs at speed, raise only a hair.
- Lock the angle. Tighten hardware, then mark the bracket so you can re-aim after bumps.
Tip: On a shoulder-step cutoff, keep the high step toward the curb side and the low edge toward oncoming traffic.
6) Mounting height and placement
Placement shapes the beam, even with a great lamp.
- Low fork mounts put light close to the road. Thus, they extend shadows from potholes and reduce fog glare. However, they can be blocked by the wheel on tight turns.
- Handlebar/stem mounts are easy to install and aim; nevertheless, they sit high and can glare if mis-aimed.
- Helmet mounts point where you look. Accordingly, they are powerful at junctions. Still, keep helmet lights dim in traffic to avoid eye-level glare.
- Dual mounts (bar + fork or bar + helmet) provide redundancy. So, if one fails, the other gets you home.
As a rule, mix one fixed, aimed headlight with one movable helper. That way, you get both consistency and flexibility.
7) Rear lights: patterns that pop without chaos
A strong rear light should be bright, wide, and stable. Conversely, rapid, high-intensity strobes can annoy or even mask distance. Instead, try this:
- Use a steady or low-frequency pulse (a slow “heartbeat”) that catches attention yet preserves depth cues.
- Mount one rear light steady and a second pulsing at a different height. Consequently, drivers judge distance more easily.
- Aim slightly down so the brightest core hits mirrors, not sky.
Meanwhile, add side-facing LEDs or reflective panels; intersections are where side visibility saves you.
8) Side visibility: where most setups fall short
Drivers notice motion first. Because of that, side markers and reflective elements matter as much as lumens.
- Wheel/spoke reflectors create moving arcs that scream “vehicle” at night.
- Frame tape along deck edges or fork legs outlines your shape.
- Turn signals help, but only if they are wide and amber; furthermore, keep them distinct from brake lights.
In short, if you ride through many crossroads, invest in side light before chasing more lumens up front.
9) Weather, tint, and color temperature
- Rain: A lower mount plus a wider beam works better. Additionally, very cool-white LEDs can sparkle off wet asphalt; a slightly warmer tint (≈4000–5000 K) often looks clearer.
- Fog: Lower and wider again. Likewise, point the cutoff down to reduce backscatter.
- Pitch-black paths: Add a spot or high-candela center inside a cutoff beam so you get reach without stray glare.
- Urban night: Keep brightness polite. Surprisingly, a shaped, moderate beam reveals more detail than a raw blaster.
Remember, more light bouncing into your eyes means less true visibility.
10) Battery, wiring, and reliability
A great beam still fails if the lamp dies halfway home. Accordingly, build reliability into your plan.
- Runtime: Map your longest ride plus a 30% buffer. Choose lights that meet that runtime on the mode you actually use.
- Swappable power: If possible, pick units with replaceable cells or quick-swap packs. That way, you aren’t stuck waiting to recharge.
- Weatherproofing: Check gaskets, USB caps, and cable routing. A simple drip loop before the port stops water from running into the connector.
- Vibration: Use metal brackets or robust mounts. Subsequently, re-tighten monthly and apply threadlocker where appropriate.
Because small failures cause big problems, carry a pencil-thin backup light in your bag.
11) Efficient settings: how to avoid wasting light
- Use the lowest mode that gives clean mid-range vision. Your eyes adapt; wasted light mainly increases glare.
- Reserve boost for dark paths only. Otherwise, you shorten runtime for no gain.
- Use DRL by day and a shaped low beam by night. Consequently, you save power and stay polite.
- Avoid extreme flash in traffic. Instead, choose a slow pulse or steady beam for clarity.
These habits extend runtime and reduce complaints; in turn, they keep everyone safer.
12) Example setups (from city to rural)
A) Urban commuter, well-lit streets
- Primary: cutoff/hybrid headlight aimed low on the bar or stem.
- Secondary: tiny flood on the helmet, set to low; then look at drivers when you want to be noticed.
- Rear: one steady + one slow pulse at different heights.
- Side: reflective tape on fork and deck edges.
Why it works: You avoid glare yet stay obvious at junctions.
B) Mixed city + dark park path
- Primary: cutoff/hybrid on the bar.
- Secondary: narrow spot or bright flood on the fork, angled slightly down for potholes.
- Rear: steady + pulse, plus side markers.
- Tip: Toggle the fork light brighter only inside the park.
Why it works: You gain reach off-street without blinding anyone on the road.
C) Rural or suburban night rides
- Primary: hybrid beam with strong candela center.
- Secondary: spot beam paired with the primary to extend distance vision.
- Rear: high-output steady with a large lens; additionally, mount a second light on your helmet or bag.
- Side: spoke reflectives for cross-traffic at farm junctions.
Why it works: Distance plus redundancy keep you safe where lighting is scarce.
13) Common mistakes (and easy fixes)
- Mistake: Pointing a bar light at the horizon.
Fix: Re-aim to create a visible cutoff on a wall, then drop it slightly. - Mistake: One ultra-bright spot with no flood.
Fix: Add a small flood or hybrid so you see the near field and lane edges. - Mistake: Only a flashing rear light.
Fix: Pair a steady rear with a slow pulse on a second light. - Mistake: No side visibility.
Fix: Add side LEDs or reflective tape; alternatively, upgrade wheel reflectors. - Mistake: Relying on lumens alone.
Fix: Compare beam shots and look for cutoff/hybrid optics.
14) Fast buying checklist (specs to look for)
No link spam—just features that signal a good light:
Front headlight
- Cutoff or clearly asymmetric optics
- Lux or beam diagrams in the description
- Firm, metal-reinforced mounts with micro-adjust tilt
- A low steady mode that still fills the near field
- Published candela or a realistic reach distance
Secondary/helmet light
- Wide flood with a simple low mode
- Lightweight with a quick mount you can aim on the fly
Rear light
- Wide lens that stays visible off-axis
- Separate steady and slow pulse modes
- Secure seat-post or rack mount, plus a clip option
Side visibility
- Clip-on side markers or high-quality reflective tape
Power & durability
- Claimed runtime that matches your route +30%
- Gasketed charge port and solid bracket hardware
15) 5 Amazon Picks That Actually Improve Visibility
- Lupine SL Nano AF (StVZO cutoff + DRL, bar remote) — a true glare-controlled headlight that mimics car low beams; ideal as a primary for traffic-heavy routes.

Lupine Lighting Systems SL AF 4 Bicycle Road Light Set
- Olight RN 1500 (anti-glare cut-off lens, IPX7, USB-C) — a cost-effective commuter headlight with shaped, anti-glare optics and solid runtime.
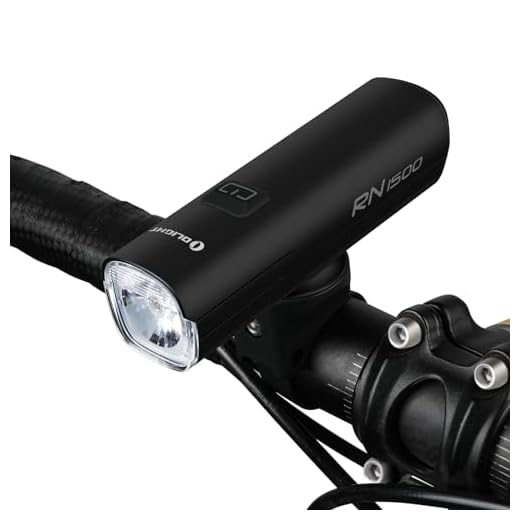
OLIGHT RN 1500 Rechargeable Bike Headlights 1500 Lumens for Road Urban Cyclists, USB Type C Reverse Charging, Rechargeable Battery Included, 164 Meters Light...
- Garmin Varia RTL515 (rear radar + taillight) — detects vehicles approaching from behind up to ~140 m and pairs with your phone or head unit for alerts.

Garmin 010-02376-00 Varia RTL515, Cycling Rearview Radar with Tail Light, Visual and Audible Alerts for Vehicles Up to 153 Yards Away
- Cygolite Hotshot Pro 200 (rear light, steady + pulse) — bright 200-lumen tail light with tunable flash speeds and excellent daytime punch; run one steady and one slow-pulse if you use two rears.
![Cygolite Hotshot Pro– 200 Lumen Bike Tail Light [FLEXIBLE MOUNT TYPE]– 6 Night & Daytime Modes– User Adjustable Flash Speed- Compact Design– IP64 Water Resistant– USB Rechargeable–Great for Busy Roads](https://m.media-amazon.com/images/I/41QxvFADq3L._SS520_.jpg)
Cygolite Hotshot Pro– 200 Lumen Bike Tail Light [FLEXIBLE MOUNT TYPE]– 6 Night & Daytime Modes– User Adjustable Flash Speed- Compact Design– IP64 Water...
- 3M Scotchlite Reflective Tape (side visibility upgrade) — high-reflectivity tape for fork legs, deck edges, and helmets; dramatically boosts cross-traffic detection without batteries.

3M Scotchlite Silver Reflective Tape, 03456, 2 in x 36 in, 1 Roll
Setup tip: Aim the cutoff headlight slightly down (top edge ~5–10 cm below eye height at 6–8 m), run the Hotshot in steady + slow pulse, and place Scotchlite along the scooter’s side profile for intersection visibility.
16) Maintenance and small habits that pay off
- Wipe lenses weekly. Even a little dust scatters light and worsens glare.
- Check aim monthly. After a curb hit, a lamp can tilt without you noticing.
- Charge intelligently. Instead of deep discharges, use partial cycles; lithium cells prefer them.
- Pack a micro-light. That way, a failure becomes an inconvenience, not a crisis.
Because lighting is safety equipment, treat it like brakes: verify it before rides that matter.
17) The 10-minute upgrade plan
- Choose a primary with a cutoff or hybrid beam.
- Add a small flood as a secondary (bar end, fork, or helmet).
- Set rear lights to steady + slow pulse at two heights.
- Install side visibility: reflectors or side LEDs/tape.
- Aim carefully using the wall method, then mark the bracket.
- Test at night on a quiet street; adjust one click at a time.
- Finally, save a preset (if supported) for city vs. path modes.
Do these steps once and your night rides change immediately—more detail ahead, less glare for everyone else, and a calmer, safer experience.
Final word
Better visibility is not about chasing the biggest lumen number. Instead, it’s about smart optics, polite aiming, and layered coverage. When you combine a shaped primary beam, a small helper light, clear rear signals, plus strong side visibility, you see more with less power—and, importantly, you stay on good terms with everyone who shares the road.