
A scooter can be one of the easiest ways to get kids outside. It builds balance, confidence, and simple road awareness. It also gives parents a fun activity that does not need a big plan or a long drive. Still, scooters come with real fall risk, so a smart setup matters from the first ride.
This guide focuses on two things families care about most. First, picking a scooter that fits your child right now. Second, setting clear safety habits that reduce injuries without turning every ride into a lecture.
The quick family checklist (use this before you buy)
Start with this list, then read the details below.
- Choose the scooter type based on age and skill
- Set handlebar height to match your child’s body
- Check the weight limit and deck size before purchase
- Pick wheel size that fits your local sidewalks and paths
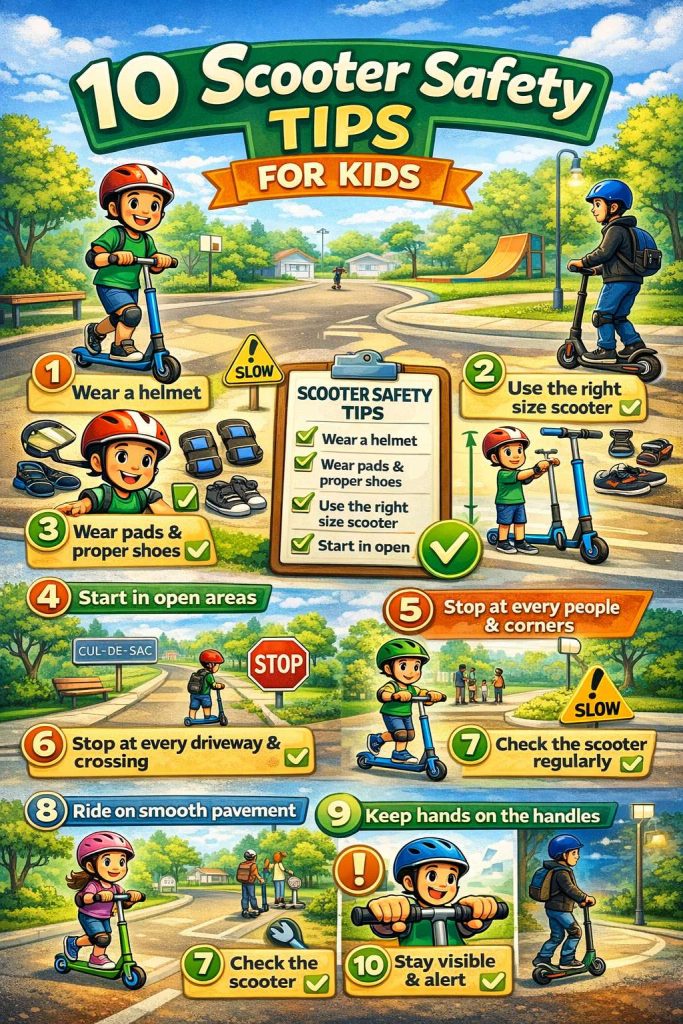
- Buy a helmet that fits well and stays stable
- Add wrist guards, knee pads, and elbow pads
- Start on flat ground with lots of space
- Agree on simple rules for speed, stopping, and crossings
Step 1: Pick the right scooter type for your child’s age
Age matters, and so does coordination. So use age as your starting point, then adjust based on your child’s control.
Ages 2–4: 3-wheel, lean-to-steer scooters
Most toddlers do best with a 3-wheel scooter. The front wheels add stability, and the lean-to-steer design feels natural once they try it a few times. It also helps them learn balance without wrestling the handlebars.
Look for
- A wide deck with room for small feet
- Smooth steering that does not snap side to side
- A rear foot brake that presses down easily
- A lower deck height for easy push-offs
Ages 4–7: stable 2-wheel scooters or advanced 3-wheel models
Many kids move to 2 wheels in this range, and that jump can go really well. But it goes best when the child can brake on purpose and keep a straight line without drifting.
Look for
- A strong handlebar stem with little wobble
- A deck long enough for brief “both feet on” moments
- A brake that slows smoothly, not suddenly
Ages 7–12: 2-wheel scooters for longer rides and daily play
At this stage, kids ride farther, and they ride faster. So comfort and wheel quality start to matter more. A scooter that feels smooth helps kids stay relaxed, and relaxed riders fall less.
Look for
- Larger wheels that handle cracks better
- Grips that feel comfortable in smaller hands
- A folding latch that locks tight with no play
Ages 8+ with skatepark interest: stunt scooters
Stunt scooters are built for impacts. So they often skip folding parts, since moving joints can fail under stress. They can feel less comfortable on long paths, but they hold up better during tricks.
Look for
- Fixed, non-folding bars and stem
- A strong deck and clamp
- Wheels made for repeated impacts
Teens: treat electric scooters as a higher-risk step
Electric scooters raise speed fast, and speed changes everything. So if you are thinking about a motorized model, treat it like a traffic activity, not a toy. Set boundaries before the first ride, not after a close call.
A simple baseline rule that many families use is “no motorized scooters under 16.” Then keep helmets non-negotiable for everyone.
Step 2: Size and fit rules that prevent common falls
A scooter that “almost fits” causes a lot of beginner wipeouts. So take two minutes to check fit before you commit.
Handlebar height
Set the handlebars around waist height when your child stands on the deck. This position supports balance and braking control. If bars are too high, steering gets sloppy. If bars are too low, posture collapses and control drops.
Deck size
Deck space matters more than most people expect. A child needs enough room for the lead foot to sit flat. Then the back foot needs space to push without clipping the deck edge. When decks feel cramped, kids shuffle their feet, and that leads to trips during quick stops.
Weight limit
Treat the weight limit as a real limit. A scooter near its max flexes more and turns worse. It also wears out faster. So pick a model that stays well above your child’s weight, even with a backpack and heavier clothes.
Grips and hand comfort
Kids often squeeze grips too hard at first. So soft grips with a comfortable diameter reduce hand fatigue. Then braking and turning feel smoother, and kids stay calmer.
Step 3: Wheel size and surface choice change the whole ride
Wheel size can make a scooter feel easy or frustrating, even on the same street.
Small wheels
Small wheels accelerate quickly and turn easily. So they feel playful and light. But they catch cracks more often, especially on rough sidewalks. Use them on smooth pavement, indoor floors, and clean park paths.
Larger wheels
Larger wheels roll over rough spots better. So they feel steadier and more forgiving. They also hold speed with less effort, which helps during longer rides.
Choose the right surface for early rides
Start on:
- Smooth, flat pavement
- Quiet park paths
- Wide open paved areas with room to turn
Avoid early rides on:
- Gravel and loose stones
- Wet leaves and slick surfaces
- Steep slopes
- Crowded paths with sudden obstacles
Step 4: Helmet fit that protects in real-life falls
A helmet only helps when it fits right and stays put. So spend a minute getting the strap and position correct.
A simple helmet fit check
Use these checks each time you put it on:
- The helmet sits level and covers the forehead
- The straps form a clean “Y” under each ear
- The chin strap feels snug, with about two fingers of space
- Do the open-mouth test. A big yawn should tug the helmet down slightly
Picking the right helmet style
For calm sidewalk riding, a standard cycling helmet is common. For skatepark riding with repeated falls, many families choose a multi-impact helmet made for that use. Still, fit matters more than the label. A perfect helmet worn wrong will not help much.
And yes, adults should wear helmets too. Kids copy what they see, so this one small habit can make the whole family safer.
Step 5: Pads and shoes that prevent the usual injuries
Scooter falls often go hands-first. Then knees and elbows hit next. So protective gear should match the way kids fall.
Wear every ride
- Wrist guards
- Knee pads
- Elbow pads
- Closed-toe shoes with grip
Skip:
- Sandals
- Loose slip-on shoes
- Long drawstrings near wheels
Wrist guards are a big deal for younger riders. They reduce the chance of a painful wrist bend when a child puts a hand out fast.
Step 6: Family riding rules kids can actually follow
Rules work best when they stay short and repeatable. So keep them simple, and say them the same way each time.
The “5 rules” system
- Helmet buckled before the first push
- One rider per scooter
- Hands stay on grips the whole time
- Slow down near people, pets, and corners
- Stop at every driveway and crossing
A 10-minute practice that builds control fast
Do this before your first real ride:
- Push twice, then brake
- Step off with control, no jumping
- Turn in big circles, then smaller ones
- Practice “freeze” stops on a parent’s call
Then repeat the brake practice at the start of each ride for one week. It sounds basic, but it works.
Step 7: Safe places to ride, and where crashes happen most
Where your child rides matters as much as what they ride.
Best places for new riders
- Wide paths with clear sight lines
- Smooth bike paths with low traffic
- Flat cul-de-sacs with close supervision
- Open paved areas with room to turn
High-risk zones
- Driveways where cars can reverse out
- Blind corners near parked cars or fences
- Sidewalks near busy intersections
- Crowded paths with sudden movement
Teach one habit early and repeat it often. Stop, look left, look right, then roll.
Step 8: Electric scooters and teens (smart family boundaries)
Electric scooters feel exciting, and teens love the freedom. Still, speed changes stopping distance and reaction time. So rules need to be tighter at the start.
Practical rules that reduce risk
- Helmet every ride
- Closed-toe shoes every ride
- No passengers, not even once
- No headphones during rides
- No phone use while moving
- Daylight-only riding in the first month
- Stick to routes you have checked together
Helmet rules can also change by country and city. So if your family travels, or if you follow updates closely, this guide can help: Ireland e-scooter helmet law update and what it could change next.
A simple first-month ramp plan
Week 1: short rides on flat paths
Week 2: longer rides, practice emergency stops
Week 3: gentle hills, focus on speed control
Week 4: routine trips, still with strict limits
That slow build keeps confidence high and mistakes small.
Step 9: Weekly maintenance checks that prevent sudden failures
Scooters take a beating, even when kids ride gently. So do this quick check once a week.
- Shake the handlebars. No rattling or looseness
- Spin the wheels. They should roll smoothly
- Test the brake. It should grip without slipping
- Check the folding latch. It must lock fully
- Look for cracks in the deck or stem
Then replace worn wheels and damaged grips early. Small failures can turn into fast forward falls.
If you own an electric scooter and you store it for winter, battery care matters too. Use this practical guide: how to store your electric scooter long term without killing the battery.
Step 10: What to buy for siblings and shared scooters
Sharing can work, but only if the setup fits both riders.
If kids are close in size
Choose a scooter with easy height adjustment and a strong clamp. Then check the clamp weekly, since it loosens over time.
If one child is much younger
Buy separate scooters. A handlebar height that fits an older child can reduce control for a smaller rider. Then falls become more likely, even at low speed.
If you want one “family scooter”
Pick a stable 2-wheel scooter with a wide deck, a strong brake, and a higher weight limit. Then keep rides slow, and stick to safe routes.
A realistic first-week plan for safer progress
Day 1 (15 minutes): helmet fit, pads, start-stop practice
Day 2 (20 minutes): turns, controlled braking, slow slalom around markers
Day 3 (20 minutes): short path ride, driveway stop habit
Day 4 (20 minutes): longer ride, safe passing rules
Day 5 (20 minutes): gentle hill control, braking distance practice
Day 6 (fun day): family ride, low speed, frequent breaks
Day 7: review rules, adjust handlebar height, re-check straps
Short sessions work best. Kids improve fast, and fatigue stays low.
Final buying checklist (print this part)
Scooter
- Fits age and skill level
- Waist-height handlebars
- Weight limit well above rider weight
- Stable deck and solid stem
- Brake works smoothly
- Wheels match your pavement
Safety gear
- Helmet sits low and level, straps snug
- Wrist guards, knee pads, elbow pads
- Closed-toe shoes
Rules
- One rider at a time
- Slow near people and corners
- Stop at driveways and crossings
- Practice braking every ride