

Getting an electric scooter to fit a tall rider is not about chasing specs. It’s about comfort, control, and safety on real streets. This Tall Riders’ Fit Guide shows you how to measure yourself, set up your cockpit, and understand geometry so you can ride longer with better control—and fewer aches.
Who This Is For + TL;DR Fit Rules
If you’re around 5’10″+ (178+ cm) or you simply feel cramped on most scooters, this section is for you. Here are quick rules of thumb to get you rolling safely and comfortably:
- Bar height window: Aim for a deck-to-bar height that lands roughly at your navel to mid-sternum. In numbers, that’s often 35–43 in (89–109 cm) depending on rider height and torso length.
- Minimum deck length: If your US shoe size is 11+, try to get 18–22 in (46–56 cm) of usable deck. For sizes 9–10.5, 17–20 in (43–51 cm) usually works.
- Split-stance angle: Start near 30–45° between your feet. Front foot points forward; rear foot offset and angled. Adjust until knees clear the bar in tight turns.
- Reach check: With a neutral stance, elbows slightly bent, you should reach the grips without shrugging. If your shoulders rise, the bar is too low or too close.
- Cable slack: After any riser or taller bar install, turn the bar lock-to-lock. Ensure no cables pull and the throttle/display do not bind.
- Lever angle: Angle brake levers so your wrists are straight when braking. Neutral wrists reduce numbness.
- Tire pressure sanity: Run within the maker’s range but slightly lower for comfort if permitted. Tall riders add leverage; small PSI tweaks can calm wobble.
- Re-torque and re-inspect: After any height change, re-torque clamps and re-inspect after the first 10–20 miles (16–32 km).
Fit Fundamentals (Posture, Reach & Stack for Scooters) — Tall Riders’ Fit Guide
Posture first. A scooter that fits lets you keep a neutral spine, relaxed shoulders, and slight elbow bend while standing tall. Your hands should fall to the grips without a shrug. Knees stay soft. Feet find support without hanging off the deck.
Reach and stack, translated from bikes.
- Reach (scooter version): The horizontal distance from your mid-stance to the grips. Too short and you feel cramped, elbows jammed, and steering twitchy. Too long and your elbows over-extend and shoulders fatigue.
- Stack (scooter version): The vertical distance from the deck to the grip tops (i.e., deck-to-bar height). Too low leads to slouching and wrist compression; too high causes shoulder elevation and poor leverage.
Balance the two. Tall riders often need more stack and a touch more reach. However, increase them gradually. Each step affects handling, cable routing, and folding geometry.
Get Your Measurements (Step-by-Step)
You can measure everything at home with a tape measure, wall, and notebook.
1) Height
- Stand barefoot against a wall.
- Mark the top of your head with a small book.
- Measure floor to mark. Record inches (cm).
2) Inseam
- Place a book between your legs, spine up, simulating a saddle height reference.
- Measure from floor to book spine. This helps estimate leg length and deck stance height comfort.
3) Arm span (wingspan)
- Hold arms out, shoulder height.
- Measure fingertip to fingertip. Many tall riders have a wingspan ≥ height, which supports slightly wider bars and more reach.
4) Shoulder width (acromion to acromion)
- Measure across the bony tips of your shoulders.
- Wider shoulders often prefer wider bars or at least more backsweep to keep wrists neutral.
5) Shoe size
- Note your US size.
- Longer feet benefit from longer decks and a split-stance to avoid toe overlap and to stabilize.
Mini Checklist
- Height: ___ in (___ cm)
- Inseam: ___ in (___ cm)
- Arm span: ___ in (___ cm)
- Shoulder width: ___ in (___ cm)
- Shoe size (US): ___
- Any prior issues? Numb hands / sore traps / knee-to-bar hits / toe overlap / wobble (circle any)
Bar Height & Reach — What Actually Works for Tall Riders
Two measurements matter and get confused often:
- Ground-to-bar height: From the ground to the grip tops. Easy to compare but includes tire size and deck height.
- Deck-to-bar height: From the deck surface to the grip tops. This is the fit number that matters because it reflects your standing platform.
For tall riders, deck-to-bar height determines whether you hunch or stand tall with soft elbows. Combine it with reach to keep shoulders down and wrists neutral.
Practical tips
- Start with stack: Get deck-to-bar in your target window.
- Fine-tune reach: Rotate bars slightly forward for more reach, back for less. Be conservative; small changes feel big.
- Wrist neutrality: Set lever angle so your forearm and hand form a line when braking.
- Throttle placement: Keep the throttle within thumb range without twisting your wrist off neutral.
- Display visibility: Raise or tilt the display so you glance down with your eyes, not your neck.
Rider Height → Recommended Deck-to-Bar Height Range & Notes
| Rider Height | Recommended Deck-to-Bar Height | Notes |
|---|---|---|
| 5’10″–6’0″ (178–183 cm) | 35–38 in (89–97 cm) | Start near navel-level. Add +0.5–1 in (+1–3 cm) if long-torso. |
| 6’0″–6’2″ (183–188 cm) | 36–40 in (91–102 cm) | Mid-sternum is common. Keep slight elbow bend. |
| 6’2″–6’4″ (188–193 cm) | 37–41.5 in (94–105 cm) | Consider a modest riser if shoulders shrug. |
| 6’4″+ (193+ cm) | 39–43 in (99–109 cm) | Use risers or taller bars; check cable slack carefully. |
Adjustment note: If your wingspan exceeds height by 2 in (5 cm) or more, you may tolerate +0.5–1 in (+1–3 cm) extra deck-to-bar. If your wingspan is shorter than height, stay on the lower end of each range.
Deck Length, Width & Stance
Deck length controls foot placement and weight distribution. Tall riders with larger feet need room to split-stance without dangling toes or bashing ankles on the rear fender.
- Length: More room allows front-rear foot offset, which stabilizes steering and reduces knee-to-bar conflicts.
- Width: Enough width to support your foot’s lateral arch prevents edge pressure points.
- Wheelbase: Longer wheelbase aids straight-line stability and smooths weight shifts, helpful for tall riders’ higher center of mass.
Split-stance basics
- Place your front foot near the front third, angled slightly forward.
- Step your rear foot back and to the side, angled outward.
- Adjust until your knees track forward without brushing the bar in turns.
Shoe Size → Comfortable Deck Length Range
| US Shoe Size | Recommended Deck Length | Notes |
|---|---|---|
| 9–10 | 17–19 in (43–48 cm) | Works with mild split-stance; watch rear fender clearance. |
| 10.5–11.5 | 18–20.5 in (46–52 cm) | Offers better offset; reduces toe overlap. |
| 12–13 | 19–22 in (48–56 cm) | Allows stable stance and quick foot switches. |
| 13.5+ | 20–23 in (51–58 cm) | Prioritize long, flat decks; consider a gentle kicktail for leverage. |
Overlap tip: If your toes touch the fender during sharp turns, slide the front foot back 0.5–1 in (1–3 cm) and slightly increase your stance angle. If that fails, you likely need a longer deck.
Rake & Trail, Explained Simply
Scooter steering feels the way it does because of two geometry pieces: rake and trail.
- Rake (a.k.a. head-tube angle): The tilt of the steering axis relative to vertical. A larger angle (more “laid back”) generally boosts straight-line stability but slows very tight steering. A steeper angle (more vertical) makes steering quicker, which can feel twitchy for tall riders with lots of upper-body leverage.
- Trail: The distance on the ground between where the steering axis would intersect the ground and the tire contact patch. More trail tends to self-center the front wheel and resist wobble. Less trail feels quicker but can get nervous at speed.
Diagram-ready description
Imagine a line running down the steering tube to the ground. That’s the steering axis line. Now find the tire’s contact patch—the middle of the tire’s footprint on the ground. Measure the horizontal distance from the steering axis ground point to the contact patch. That distance is trail.
Plain-English rules of thumb for tall riders
- If you feel wobble at speed, you likely prefer more trail or slightly lower tire pressure (within spec).
- If tight cornering feels like work, you may have too much trail, or your bar is too high/forward.
- A moderate rake with moderate trail is a safe middle ground for taller riders.
Risers That Actually Help (and When to Skip Them)
Risers can solve low bar problems, but only when installed safely and thoughtfully.
Options
- Fixed risers/spacers: Add 1–2 in (2–5 cm) of vertical stack. Simple, but check stem clamp engagement and folding geometry.
- Stem extenders: More range, yet they alter leverage on the folding joint. Use only within the maker’s guidance.
- Taller bars: Clean solution if compatible. Usually preserves cable routing better, yet may require longer hoses/cables.
Pros
- Restores neutral posture.
- Frees elbow room.
- Reduces shoulder shrug.
Cons
- Cable/throttle/display slack limits.
- Increased lever arm on the folding clamp.
- Possible bag or trunk fit issues when folded.
Safety cautions
- Consult your scooter’s manual for compatibility and torque values.
- After installing, turn bars lock-to-lock and compress suspension (if any). Ensure nothing binds, pulls, or kinks.
- Re-torque all fasteners after the first few rides and again at 50–100 miles (80–160 km).
When to skip
- If the folding clamp has minimal overlap already.
- If cables are already taut at full lock.
- If a riser would cause the folded scooter to no longer fit your routine (car trunk, hallway, locker).
Cockpit Setup for Long Torso/Arms
A thoughtful cockpit turns size into an advantage.
Bar width & sweep
- Start with a width that matches your shoulder line. If the grips are much narrower, shoulders roll forward; too wide and elbows flare.
- A little backsweep (5–9°) can keep wrists straight. Tall riders often like a touch more backsweep than average.
Grip diameter
- If your hands are large, slightly thicker grips can spread pressure and reduce tingling.
Lever reach
- Adjust the reach screw so you can brake with index and middle fingers without stretching.
- Angle levers so your wrist stays neutral while braking hard.
Display & bell/horn placement
- Place the display where you glance with your eyes, not your neck.
- Keep bell/horn reachable without shifting your hand off the grip.
First-ride adjustment checklist
- Standing neutral, elbows soft, shoulders down.
- Squeeze brakes hard: wrists straight?
- Rotate bar a few degrees forward/back in tiny steps until it feels planted yet nimble.
- Re-check cable slack at full lock.
Stability vs Agility Trade-offs
Tall riders carry a higher center of mass, which magnifies handling traits.
- Head-tube angle & trail: More trail and a slacker head angle calm high-speed shimmy. But it can slow very tight maneuvers.
- Wheel size: Larger wheels roll smoother and resist deflection, which many tall riders appreciate.
- Tire type: Wider, higher-quality tires generally offer better grip and comfort.
- Tire pressure: Stay within the recommended range. Slightly lower pressures can add damping and reduce jitter, but do not go so low that you risk pinch flats or rim strikes.
- Suspension preload: If adjustable, add just enough preload to reduce dive without making the front end chattery.
- Weight distribution: A split-stance lets you shift pressure between wheels, calming steering in wind or at speed.
Portability & Daily Usability for Tall Riders
Big fit does not have to mean big hassle.
- Fold height vs trunk fit: Measure your car trunk opening. A riser may add 1–3 in (2–8 cm) of folded height.
- Carry balance: When carrying, grab near the balance point—usually just forward of center. Slightly flex knees to protect your back.
- Stair strategy: Use short, controlled steps. Secure the bar so it does not swing.
- Storage height: Make sure your storage spot can handle any added bar height.
- Office/hallways: Check door clearances after risers or taller bars.
Testing Protocol: Prove Your Fit in 20 Minutes
Find a safe area with light traffic. Create a short loop and hit six stations. Wear protective gear. Follow local rules.
- Start/Stop Line
- Do five smooth starts and stops.
- Good fit feels: Upright posture, no wrist dip, elbows soft. You can look ahead while braking.
- Slow Slalom
- Set five cones (or mental markers) 10–12 ft (3–3.7 m) apart. Ride at walking speed.
- Good fit feels: Bar responds without over-steer. Knees don’t crash the bar. No cable snags at full lock.
- Moderate Hill (~7–8%)
- Climb and descend once.
- Good fit feels: You can shift weight forward when climbing and back when descending while keeping wrists neutral.
- Rough Asphalt Patch
- Ride across at moderate speed.
- Good fit feels: Front end tracks without chattering. Slightly lower tire pressure (within spec) may help if harsh.
- Emergency Stop
- From 12–15 mph (19–24 km/h), brake firmly twice.
- Good fit feels: Lever reach is perfect. Bars stay straight. Forearms are in line with hands.
- Hands-Light Hover
- At 8–10 mph (13–16 km/h) on smooth pavement, loosen grip slightly while staying ready.
- Good fit feels: Scooter tracks straight. If it darts, experiment with bar rotation, tire pressure, or stance width.
Log quick notes. Make one change at a time. Re-run the loop.
Common Problems & Quick Fixes
- Numb hands: Thicker grips, correct lever angle, and a touch more backsweep. Consider slightly lower tire pressure within spec.
- Sore traps/neck: Bars too low or too close. Increase deck-to-bar height 0.5–1 in (1–3 cm), or rotate bars forward slightly.
- Knee hitting the bar: Increase stance angle and slide front foot back 0.5 in (1 cm). Consider longer deck.
- Toe overlap with fender: Shift front foot back and outward. If persistent, you need more deck length.
- Stem wobble: Stop riding and inspect clamp, bolts, and folding mechanism. Re-torque to spec; replace worn parts.
- Twitchy steering: Add a bit of trail (not user-adjustable on most scooters), reduce tire pressure slightly within spec, and check bar rotation.
- Hard braking feels unstable: Move lever reach closer, lower your center of mass, and widen stance.
Scooter Suggestions for Tall Riders
Below are five models that can work well for taller riders, chosen from the allowed list. Each has a brief, honest reason why it might fit.
- Segway Ninebot MAX G2 — Roomy deck feel and stable manners make it friendly to a higher center of mass.

- Segway Ninebot F2 Pro — Secure handling with a cockpit many tall riders find natural after minor tweaks.

EU Stock Ninebot by Segway F2 Pro Electric Scooter 450W Motor 32KM/H Max Speed 55KM Range F Series Original Smart Kickscooter
- NIU KQi 300P — Taller perceived stack and a solid platform support relaxed shoulders and neutral wrists.

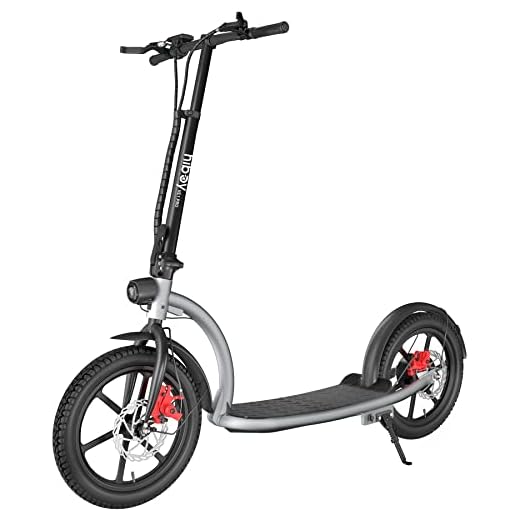
- Hiboy VE1 Pro — Deck space and calm steering help reduce wobble for longer legs and arms.
- JOYOR S10-S-Z — Stance room and planted ride character suit riders seeking stability over twitchy agility.
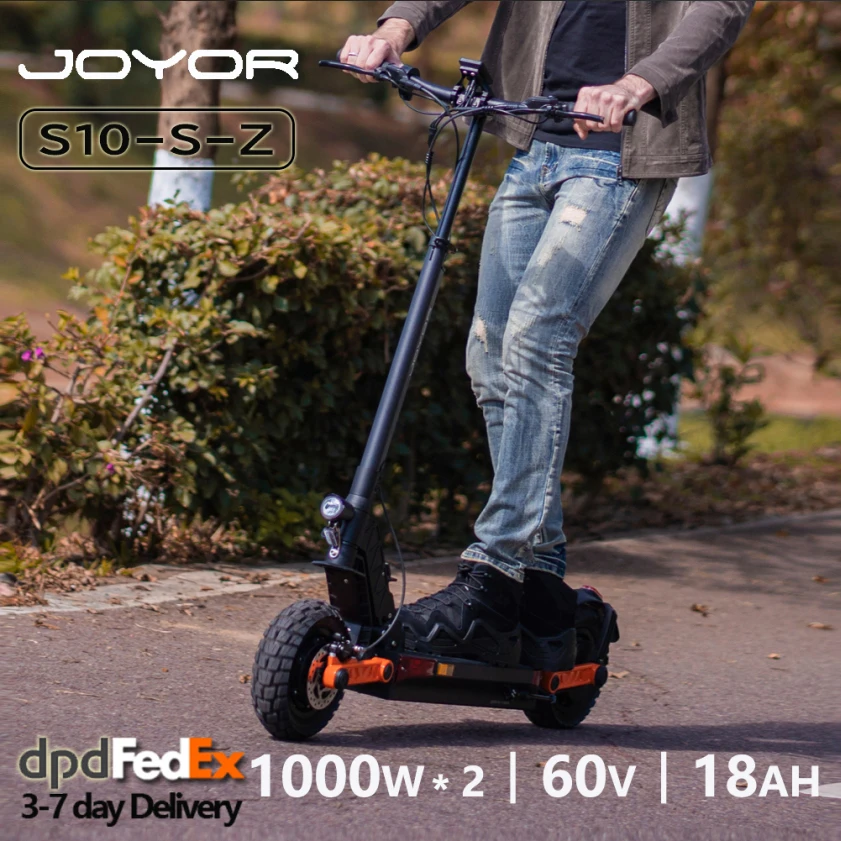
JOYOR S10-S-Z Folding Electric Scooter Dual 1000W Motor 10" Adults E-scooter with 60V 18Ah Battery
FAQs
Do I measure bar height from the ground or from the deck?
Measure deck-to-bar for fit, because it reflects how high the grips are relative to your stance.
What if I’m 6’4″ (193 cm) and still feel hunched?
You likely need more stack. Consider a small riser or taller bars, then re-check cable slack and clamp engagement.
How do I stop speed wobble?
Improve stance (wider with knees soft), ensure correct tire pressure, and make sure the stem clamp is tight and free of play. More trail generally helps, though it’s not usually user-adjustable.
Which comes first, bar height or reach?
Set stack first so your shoulders relax. Then fine-tune reach with tiny bar rotations or cockpit moves.
Can lever angle really fix numb hands?
Often yes. Neutral wrists reduce median nerve compression. Pair with proper grip size and backsweep.
Is a longer deck always better for tall riders?
Not always. Longer decks add room and stability, but they can reduce portability and require more deliberate weight shifts.
What’s the right stance angle for me?
Start at 30–45° and adjust until knees clear the bar in tight turns while you still feel planted.
Where does the “tall riders’ fit guide” suggest placing the display?
Place it so you glance with your eyes, not your neck—typically just below your sightline with the bar at your chosen stack.
Do local rules affect handlebar setups?
Rules vary by location. Keep your setup safe and always follow local requirements.
Glossary
- Deck-to-bar height: Vertical distance from deck surface to grip tops. Primary fit number for bar height.
- Ground-to-bar height: Vertical distance from ground to grips. Easier to measure but includes wheel and deck height.
- Reach (scooter): Horizontal distance from your stance to the grips; affects elbow bend and shoulder comfort.
- Stack (scooter): Vertical distance from deck to grips; affects posture and wrist neutrality.
- Rake: The head-tube angle relative to vertical; influences steering speed and stability.
- Trail: Ground distance between the steering axis line and tire contact patch; increases self-centering.
- Toe overlap: Front toes contacting fender or tire in tight turns; often solved with stance tweaks or longer decks.
- Preload: Initial spring compression in a suspension; sets ride height and responsiveness.
- Kicktail: Upturned deck tail that adds leverage for lifting the front wheel.
- Wobble (shimmy): Oscillation of the front end at speed; mitigated by stance, geometry, pressure, and clamp integrity.
- Backsweep: Rearward angle of the grips relative to straight; helps wrist neutrality.
- Lever reach: Distance from grip to brake lever resting position; set so fingers hook naturally.
- Wheelbase: Distance between front and rear wheel centers; longer is usually more stable.
- Clamp engagement: How much the folding/stem clamp overlaps and grips; critical for safety.
- Neutral spine: Natural S-curve posture without slouching or hyper-extension.
Printable Fit Checklist
Pre-Ride Fit
- Height, inseam, arm span, shoulder width, shoe size recorded
- Target deck-to-bar chosen: ___ in (___ cm)
- Bar rotated for slight elbow bend; shoulders relaxed
- Lever reach set for index/middle finger braking
- Lever angle aligns wrist and forearm
- Grips comfortable diameter; backsweep feels natural
- Display readable with eye glance only
- Bell/horn reachable without hand shift
- Cables/hoses slack check at full lock both ways
- Stem/folding clamp torqued to spec
Deck & Stance
- Deck length suits shoe size and stance
- Split-stance around 30–45°; knees clear bar in turns
- No toe overlap; if yes, adjust stance or reassess deck length
Tyres & Suspension
- Tire pressure set within recommended range
- If adjustable, preload set for support without harshness
20-Minute Test Loop
- Starts/stops smooth; posture stays neutral
- Slow slalom steady; no cable binding at full lock
- Hill climb/descend balanced; wrists neutral
- Rough patch controlled; no chatter
- Emergency stop stable; levers comfortable
- Hands-light hover tracks straight
After First Rides
- Re-torque clamps/bolts
- Inspect for play in stem/folding joint
- Re-check cable slack
Final Notes on Safety and Setup
Take changes one step at a time. Each tweak—bar rotation, riser, pressure—affects the whole system. Tall riders bring leverage that magnifies both good and bad setups. Go slow, make notes, and favor control over extreme positions. For any install, follow the manufacturer’s guidance for compatibility and torque. Local rules differ; ride accordingly.
Throughout this guide we used the focus keyphrase Tall Riders’ Fit Guide to frame the setup decisions that matter. Apply the measurements, run the test loop, and you’ll feel the difference within a single session.